
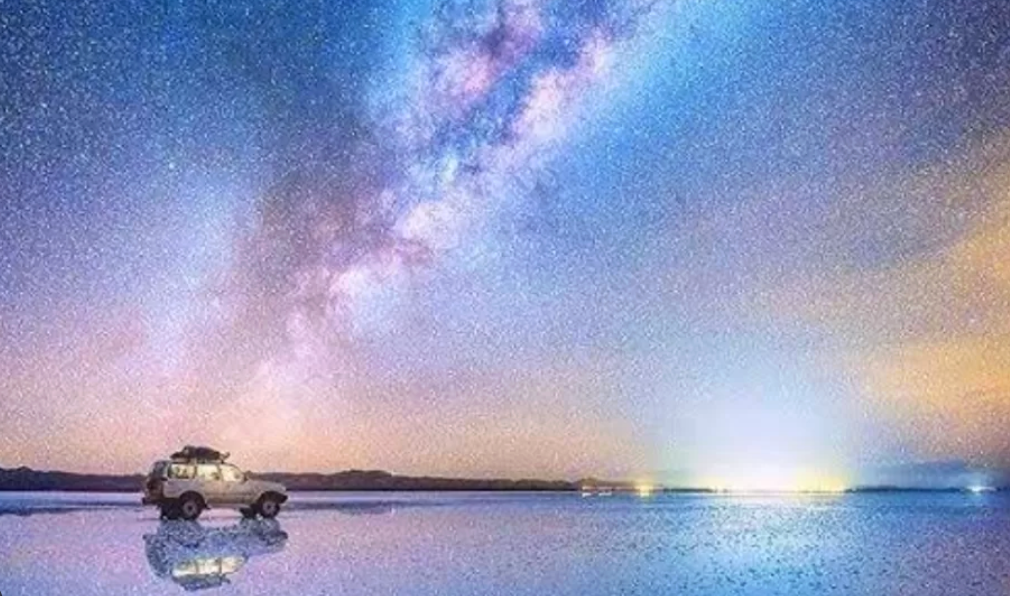
The photograph appears simple at first glance: a band of white light arching across the sky, reflected in a flat surface below it, so that the image shows stars above and stars below with nothing — no horizon, no edge, no reference point — to separate the two. The location is the Salar de Uyuni on a moonless night in June. The photographer spent four hours lying on the salt crust at 3,656 metres above sea level to get it.
The Salar de Uyuni is widely considered one of the best places on Earth to photograph the Milky Way. The reasons are straightforward: it is one of the darkest places in South America, with almost no light pollution for 300 kilometres in any direction; the dry season air at altitude is exceptionally transparent; and during moonless nights in the dry season (May through October), the Milky Way core rises to near-zenith, directly above a surface that reflects it. No other accessible location on the planet combines these factors the way Uyuni does.
This guide covers every aspect of Milky Way photography at Uyuni — the best months, the camera settings, how to find and frame the Galactic Centre, the dry crust reflection technique, star trail stacking, and the practical logistics of shooting through the night at 3,600 metres in the cold.
Why the Salar de Uyuni Is Exceptional for Milky Way Photography
Most astrophotography locations have one or two factors working in their favour. The Atacama Desert has exceptional atmospheric transparency. The Canary Islands have good seeing conditions and low humidity. The darkest sites in the US Great Basin have minimal light pollution. Uyuni has all three, plus a feature no other location matches: a reflective surface that is simultaneously the ground and a mirror.
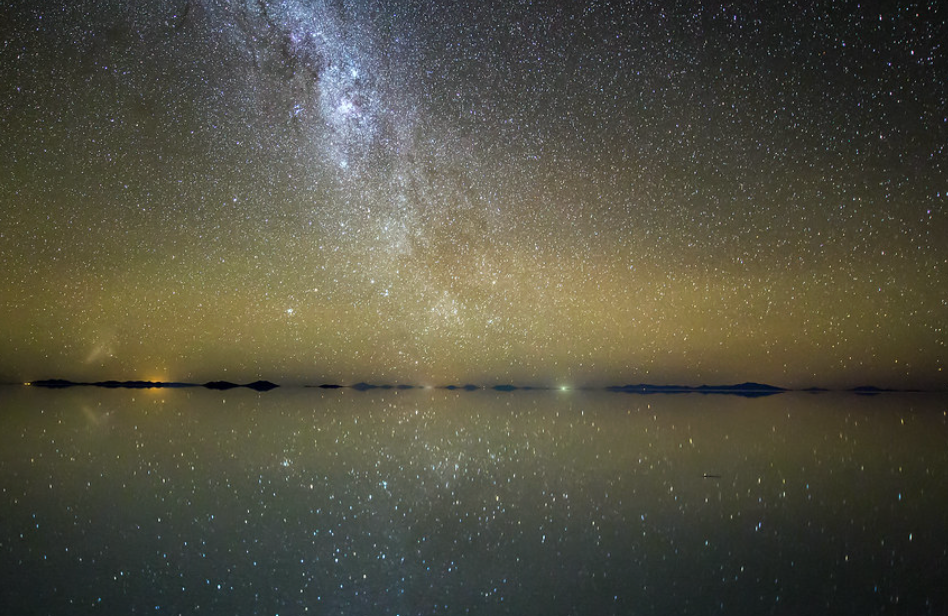
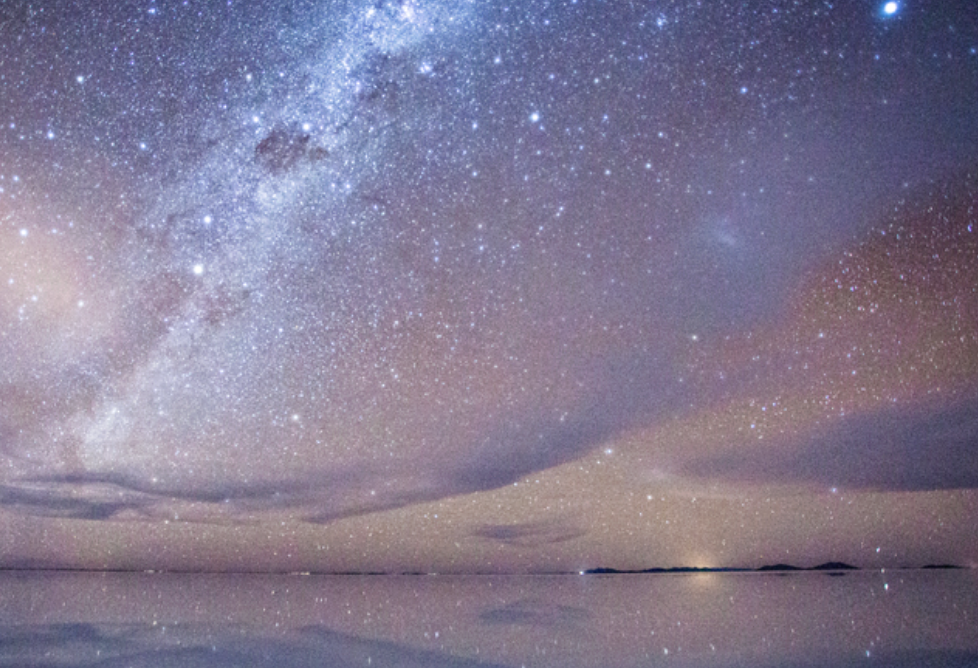
During the dry season (May–October), the salt crust is completely dry and its white surface reflects starlight. This is not a mirror reflection in the photographic sense — you cannot see individual stars in it with the naked eye — but a long-exposure camera pointed at the flat captures a faint glow in the lower portion of the frame that echoes the structure of the sky above. In the right conditions — dark sky, long exposure, wide aperture — this creates the impression that the Milky Way continues below the horizon as well as above it.
Additionally, Uyuni’s elevation of 3,656 metres means you are shooting through roughly 65% of the total atmosphere, compared to sea level. The remaining 35% of atmosphere above you is drier, thinner, and contains fewer of the water vapour molecules that scatter and absorb starlight. The stars at Uyuni are simply brighter and more numerous than at any low-altitude site with equivalent light pollution.
The table
| Factor | Uyuni Advantage | Impact on Photography |
|---|---|---|
| Light pollution | Bortle Class 1–2 (darkest possible) | Milky Way core visible to naked eye; thousands of stars in frame |
| Altitude | 3,656 m — shoot through 65% of atmosphere | Stars appear brighter; less atmospheric scatter; better colour |
| Dry season humidity | Near-zero in June–August | Exceptional atmospheric transparency; no dew on lenses |
| Reflective surface | White salt crust echoes star patterns | Creates apparent star-below-horizon effect in long exposures |
| Flatness | Elevation variation <1m across 10,582 km² | Perfect level horizon in every direction; no obstruction of Galactic rise |
| Nearest city light | Uyuni town (pop. 20,000) — minimal glow | Does not contaminate dark sky even at low horizon angles |
Best Months and Moon Phase Planning for Uyuni Astro Photography
Timing is more critical for Milky Way photography than for any other genre. The two variables that determine whether you get the shot are the season (which controls the position of the Galactic Centre in the sky) and the moon phase (which controls whether the sky is dark enough to see the Milky Way).
Galactic Centre visibility at Uyuni
The Milky Way’s Galactic Centre — the brightest and most photographed portion of the galaxy — rises in the southeast from Uyuni at the following approximate times during the dry season: May (23:00), June (21:00), July (20:00 — peaks around midnight), August (19:00 — well-placed all night), September (sets by midnight). August gives the longest window of darkness with the Galactic Centre high in the sky, but June and July are also excellent. October is the last viable month before the wet season brings cloud cover.
Moon phase — the most important variable
A full moon at Uyuni produces enough light to read a book on the salt flat. It also completely overwhelms the Milky Way. For astro photography, you need the sky to be dark — which means shooting within 5–7 days of the new moon, when the moon either does not rise or rises after midnight. Plan your Uyuni astro trip around the lunar calendar. Resources: PhotoPills app, The Photographer’s Ephemeris, or any online moon phase calculator. Book your tour departure date to align with the new moon.
| Month | Galactic Centre | Window (moonless nights) | Temperature at Night | Recommended? |
|---|---|---|---|---|
| May | Rising 23:00 | ~7 nights around new moon | -5°C to -15°C | Good — start of season |
| June | Rising 21:00 | ~7 nights around new moon | -10°C to -20°C | Excellent — long dark window |
| July | Rising 20:00 | ~7 nights around new moon | -12°C to -22°C | Best — peak Galactic position |
| August | Rising 19:00 | ~7 nights around new moon | -8°C to -18°C | Excellent — longest shooting window |
| September | Sets midnight | ~7 nights around new moon | -5°C to -12°C | Good — warmer, shorter window |
| October | Low, fading | ~7 nights around new moon | 0°C to -5°C | Marginal — wet season risk begins |
Camera Settings for Milky Way Photography at Uyuni
Astrophotography settings are governed by a few fundamental constraints: you need enough light to capture stars (wide aperture, high ISO, adequate exposure time), but not so much exposure time that stars trail across the frame as the Earth rotates. The practical limit before star trails appear depends on your focal length — the NPF rule (Nienhuis-Petersen-Flint) gives you the maximum safe exposure time for any lens and sensor combination.
| Setting | Recommended Value | Explanation |
|---|---|---|
| Aperture | f/1.4 – f/2.8 | As wide as your lens allows — every stop gained doubles the light |
| Shutter speed | 15–25s (full-frame); 10–15s (crop sensor) | NPF rule: 500 / (focal length × crop factor) for a rough maximum before trailing |
| ISO | 3200–6400 (full-frame); 1600–3200 (crop) | Test your camera’s noise floor before the trip — some sensors handle 6400 cleanly |
| White balance | 3800K–4200K (manual) | Tungsten-to-daylight range; prevents orange cast from distant town lights |
| Focus | Manual — infinity focus | AF fails in darkness; focus to infinity, then fine-tune with Live View zoom on a bright star |
| Format | RAW only | JPEG destroys the shadow detail and colour gradients you need for Milky Way processing |
| Lens | 14–20mm full-frame (or equivalent) | The wider the focal length, the longer the safe exposure time and the more sky captured |
The NPF rule in practice
The quick version: divide 500 by your effective focal length. On a full-frame camera with a 16mm lens, 500 ÷ 16 = 31 seconds maximum. On a crop-sensor camera with a 10mm lens (16mm equivalent), use 10 × 1.6 = 16mm equivalent, giving 500 ÷ 16 = 31 seconds — but the crop sensor requires the same calculation. A more conservative and more accurate method is to use the PhotoPills app’s NPF rule calculator, which accounts for pixel pitch. In practice: 20 seconds at 14mm on full-frame, 15 seconds at 14mm on a 1.5x crop sensor, are reliable starting points.
The Dry Crust Reflection Technique
The technique that defines the best Uyuni astro shots is deceptively simple. The dry salt crust is white and faintly reflective — not a mirror, but enough to catch ambient starlight in a long exposure.
The steps:
1. Find a location with minimal footprints and tyre tracks. The hexagonal crust between the tracks is the cleanest reflective surface. Drive at least 5–10 km from the main tourist area toward the centre of the flat where the crust is least disturbed.
2. Set up before astronomical twilight ends (roughly 90 minutes after sunset). Give your eyes 20 minutes to fully dark-adapt before you start shooting.
3. Shoot with your camera 5–15 cm above the crust surface. The lower the camera, the more the flat surface fills the lower portion of the frame and the stronger the sense of the sky continuing below the horizon. A right-angle viewfinder or a tilting screen is essential — you will not be able to see through a standard viewfinder from this position.
4. Use a foreground element. A lone person standing in the frame (illuminated by a brief 2-second torch flash during the exposure) gives the image scale and prevents the composition from becoming pure abstraction. A single person standing in a sea of stars above and below is one of the iconic Uyuni images.
5. Expose for 20–25 seconds at f/2.8 ISO 6400 and check the histogram. The peak of your histogram should be in the left third of the range. The image will look darker than correct on screen — this is normal. The shadow detail is there in the RAW file.
The Table
| Technique | Setup | Effect in the Image |
|---|---|---|
| Basic Milky Way arch | Wide angle, horizontal frame, camera at tripod height | Classic arch of galaxy over flat horizon |
| Crust reflection | Camera 5–15cm above salt, 20s exposure | Stars appear both above and below apparent horizon |
| Human silhouette | Person standing at 10–15m, lit briefly by headlamp during exposure | Scale reference; iconic Uyuni astro shot |
| Light painting | Torch/flashlight used to illuminate jeep, person, or cactus island during exposure | Dramatic foreground lit against star field |
| Star trails (2+ hours) | Intervalometer: 30s frames × stacked in StarStax or Sequator | Long arching star trails over the flat — distinct from Milky Way shots |
| 360° panorama | 6–8 portrait frames rotated around vertical axis, stitched in PTGui | Full dome of sky with Milky Way arch across top and reflective flat below |
Star Trail Photography at Uyuni
Star trails — the long arching streaks that appear when the Earth’s rotation is captured over a 1–3 hour exposure — work particularly well at Uyuni because the flat, featureless horizon gives the circular trails of Polaris (or the equivalent southern rotation point) an unobstructed path across the sky.
For star trail photography, the method is not a single long exposure but hundreds of shorter exposures stacked in post-processing software. Single long exposures accumulate thermal noise that degrades the image; stacked short exposures give you the same total light with a fraction of the noise.
The workflow: Set your intervalometer to fire a 30-second exposure every 31 seconds (1 second gap for buffer write). Shoot for 2–3 hours. Import the sequence into StarStax (free) or Sequator (free) and blend in “Comet mode” for trails or “Accumulate” for a single-frame-equivalent result. In StarStax, enable Gap Filling to prevent breaks in the trail lines from the 1-second gaps. Export as a 16-bit TIFF for Lightroom finishing.
Finding the Right Location on the Flat
Not all of the Salar de Uyuni is equally good for night photography. The area within 5 km of the main entry point near Colchani is heavily trafficked — tyre tracks, footprints, and vehicle lights from other tour groups will appear in your exposures. For the best results, you need to drive further into the flat.
The area near Isla Incahuasi (the cactus island) is one of the most photographed daytime spots, but at night it becomes a useful anchor point for compositions — the tall cacti can be light-painted against a star field. The best flat surface for the reflection technique is roughly 3–5 km south of the island on the open flat.
The absolute darkest area of the flat, with no light pollution from any direction, is the central-western section — accessible only on a full-day private tour. Ask your guide specifically to position you at the darkest point for the astro session. The difference in sky quality between the tourist-area flat and the central flat is visible to the naked eye.
Gear for Cold-Altitude Night Shooting
The conditions at Uyuni on a clear winter night are genuinely extreme. A July moonless night will see temperatures between -15°C and -22°C with wind chill. Your camera equipment is not designed for these conditions unless you have tested it. The following considerations apply:
| Gear Item | Issue at Uyuni | Solution |
|---|---|---|
| Camera battery | Loses 40–60% charge in cold air | Keep 3+ spare batteries inside your jacket; rotate in every 45 minutes |
| Lens focus ring | Lubricant thickens in extreme cold; manual focus gets stiff | Pre-focus to infinity before cold sets in; avoid rotating the ring in -20°C |
| Dew on front element | Rapid temperature changes near dawn cause condensation | Keep lens hood on at all times; bring microfibre cloths |
| Tripod leg locks | Salt crystals and cold can seize ball-head mechanisms | Tape leg locks before the session; loosen before shooting, not during |
| LCD screen | Refresh rate drops below -10°C; can go black temporarily | Use electronic viewfinder if available; cover body with jacket when checking settings |
| Intervalometer cables | Become brittle and snap in extreme cold | Keep cable bundled against the camera body, not hanging exposed |
Post-Processing the Milky Way: Lightroom and Photoshop Workflow
Milky Way images straight out of camera look flat, noisy, and colourless. The processing work is substantial — but the RAW file contains everything you need. The goal is to reveal the colour and structure that the sensor captured but that the default rendering suppresses.
Lightroom global adjustments
Start with Exposure +0.8 to +1.2 to bring the overall image into viewing range. Pull Highlights to -50 to prevent the brightest stars from blooming. Lift Shadows to +40 — this is where the Milky Way structure lives. Set Blacks to -20 to give depth to the true darkness between stars. Clarity +30 brings out the cloud structure within the Milky Way. Dehaze +20 cuts the slight atmospheric glow near the horizon.
Colour grading
The Milky Way is not white — it is a warm gold-yellow in the core and transitions to blue-green in the outer arms. Set White Balance to 3800–4200K and Tint slightly toward the green (+5 to +10) to avoid the magenta cast that appears at low colour temperatures. In the HSL panel, lift Aqua and Blue Saturation to 25–35 to bring out the blue of the star-forming regions in the outer arms.
Noise reduction
High-ISO Milky Way images have significant luminance and colour noise, particularly in the shadow areas. In Lightroom: Luminance noise reduction 50–70, Detail 50, Contrast 40. Colour noise: Smoothness 70. If using Lightroom AI Denoise (available in 2024+ versions), use 50–70 strength — this is dramatically better than the manual sliders and produces clean, detail-preserving results at ISO 6400.
How to photograph the Salar de Uyuni mirror effect
Daytime mirror-effect settings, sunrise timing, and composition techniques — the companion guide to this night-photography article.
Creative Approaches: Beyond the Basic Milky Way Arch
The standard Milky Way arch shot — wide angle, landscape orientation, galaxy arching from one side of the frame to the other — is the image most people come to Uyuni to make. It is a beautiful shot and it is entirely achievable on your first night with the right preparation. But after you have it, there are more creative approaches that produce images which stand apart from the tens of thousands of similar Uyuni astro shots posted every year.
The vertical panorama
Rotate your camera to portrait orientation and shoot 3–4 frames from near-ground to zenith, then stitch them in Lightroom or Photoshop. The resulting image shows the full Milky Way arch from horizon to horizon in its complete vertical extent, with the salt flat occupying the bottom quarter. This is a format that the standard single frame cannot capture and that most viewers have never seen — the full scale of the galaxy above a landscape that matches it for flatness and scale.
The 360-degree dome panorama
With a wide-angle lens and a rotating tripod head (or careful manual rotation between frames), a full-dome panorama captures every direction of the night sky simultaneously. Stitched in dedicated software (PTGui, Hugin) and projected in a spherical or little-planet projection, the result shows the entire Milky Way above the salt flat in a single image. This is technically demanding but the results are extraordinary and essentially impossible to replicate at most other locations.
Light painting on the flat
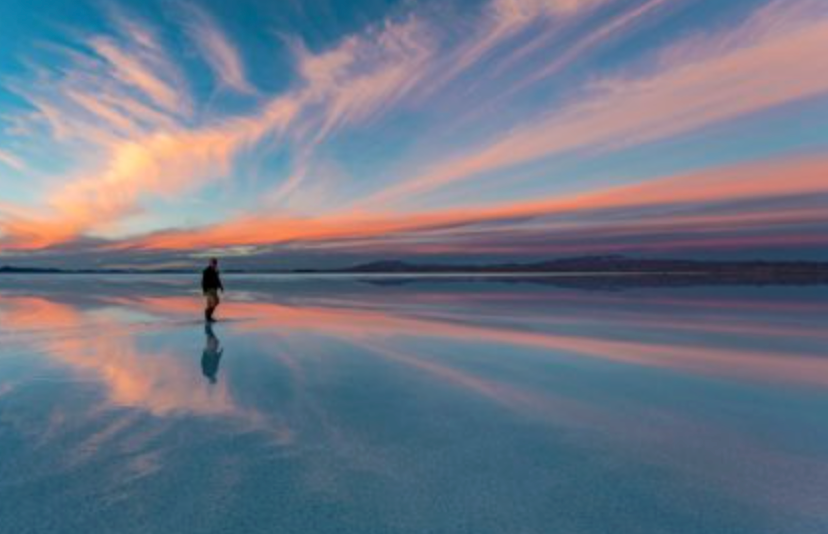
During a 20–25 second exposure, you have time to illuminate foreground elements with a torch or headlamp. Common approaches: spelling words in light across the flat by walking rapidly with a torch; illuminating a single person standing at 15 metres so they glow against the star field; painting light around the base of a salt polygon to make it glow as a foreground element. The key technique is to move constantly — a stationary light source creates a bright blob; a moving light creates an even wash. Practice at home before your trip.
Conclusion: The World’s Best Accessible Astrophotography Location
Uyuni at night is one of those places that changes the way you think about photography. Standing on a white salt flat at 3,600 metres on a moonless July night, with the Milky Way arching from horizon to horizon above you and a faint echo of it in the flat below, you understand viscerally why photographers travel thousands of miles and endure -20°C cold to be here.
The logistics are demanding. The cold is real. The planning around moon phases and dry-season windows requires attention. But every photographer I know who has done it says the same thing: it was worth every hour of preparation. The images you come back with from a well-planned Uyuni astro session are not just good photographs — they are reminders of what the sky actually looks like when you get far enough from the cities to see it.
This article is part of the Bolivia & Salt Flats Photography series on Uncover the Andes. The companion articles — how to photograph the mirror effect at sunrise, and the complete dry season vs wet season comparison — are both live in the photography section. See you under the stars.