
You have done the research. You have booked the flights and chosen the trek. Also you have the camera, the layers, the trekking poles, and the altitude medication. And then you look at your backpack — the same one you have used for weekend trips and carry-on flights — and wonder if it is going to hold together for four days on the Inca Trail at 4,200 metres, or a week crossing the Bolivian altiplano with a full camera kit strapped inside.
The answer is probably not. Expedition trekking in the Andes places demands on a backpack that are categorically different from travel or day hiking. The altitude cold contracts materials and stiffens zippers. The UV radiation at 4,000+ metres degrades synthetic fabrics faster than at sea level. The salt spray from the Salar de Uyuni corrodes metal hardware. The daily 15–25 km on uneven terrain with a 12–18 kg load tests every stitch and buckle. And if you are carrying camera gear on top of your clothing and shelter — which most people who visit this blog are — you need a pack that was designed around real load management, not airport convenience.
This guide covers the best expedition backpacks for Andes trekking and photography in 2026. Every pick has been evaluated against the specific demands of high-altitude Andean conditions: load transfer at altitude, rain cover performance in Patagonian weather, access systems for photographers, and durability under extended expedition use. You will find direct links to each pack on Amazon — all using my affiliate link at no extra cost to you — plus the internal gear and destination guides you need to plan the full trip.
Why Your Backpack Choice Matters More in the Andes Than Anywhere Else
Most people underestimate their pack until it fails. On a day hike or a weekend camping trip, a mediocre backpack is an inconvenience. On a 5-day Salkantay Trek at altitudes between 2,800 and 4,600 metres, a poorly fitting or poorly constructed pack is a trip-ending problem — and potentially a health risk.
The specific demands of Andean trekking include:
Load at altitude: At 4,000 metres your body is already working 30–40% harder than at sea level to perform the same physical output. Every extra kilogram on your back is disproportionately expensive at altitude. A backpack that transfers load efficiently to your hips — rather than hanging from your shoulders — is not a luxury; it is the difference between finishing the trek comfortably and developing the shoulder and lower back pain that ruins the final two days.
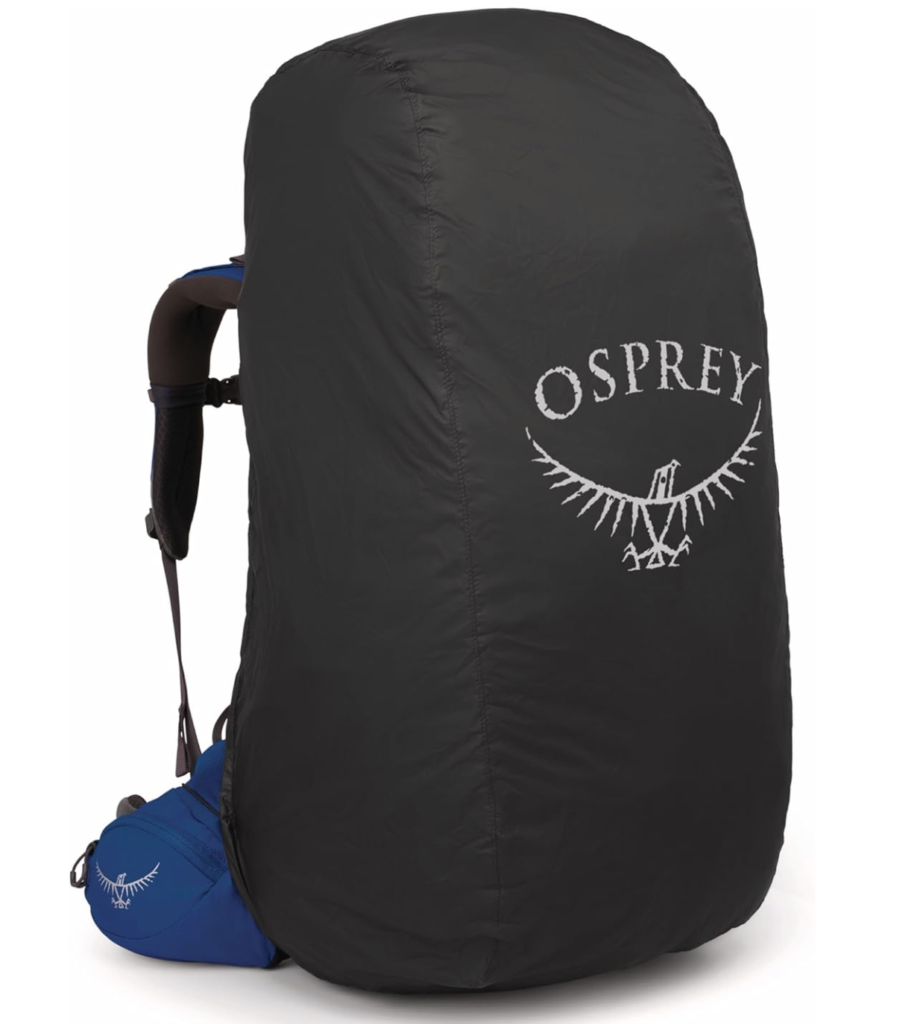
Weather range: The Andes can deliver rain, hail, snow, burning sun, and freezing wind within a single afternoon. An expedition pack needs an integrated or attachable rain cover, materials that do not soak through (cotton is disqualifying), and a construction that keeps your sleeping bag, down jacket, and camera dry when everything else is wet.
Camera gear integration: Many visitors to this blog are travelling with a mirrorless camera, 2–3 lenses, a tripod, and associated accessories. A pack designed purely for trekking has no dedicated camera protection, no quick-access side panels, and no way to separate fragile optics from boots and wet rain gear. We address this in the dedicated photography section below.
Durability of hardware: Zippers, buckles, shoulder strap webbing, and hip belt padding all degrade faster under altitude UV exposure, salt exposure at Uyuni, and the sustained mechanical stress of a multi-week expedition. The packs in this guide use hardware rated for long-term expedition use — not the kind that splits on day three.
The table
| Factor | Why It Matters in the Andes | What to Look For |
|---|---|---|
| Fit system | Load transfer at altitude reduces fatigue and altitude sickness risk | Adjustable torso length, contoured hip belt with padding |
| Weight | Every kg is expensive at 4,000+ m | Target under 1.8 kg empty for a 65L pack; lighter for day packs |
| Rain protection | Patagonia and cloud forest receive 200+ cm of rain annually | Integrated rain cover or DCF/ripstop materials with DWR treatment |
| Back panel ventilation | High exertion at altitude produces heavy sweat — a wet back causes chilling | Tensioned mesh back panel keeps pack off the spine for airflow |
| Access points | Photographers need fast access to camera gear on the trail | Top-load + front-panel access + side water bottle pockets minimum |
| Material durability | UV at 4,000+ m degrades fabric; salt at Uyuni corrodes metal | 210–420D nylon or Dyneema; YKK or Nifco hardware only |
| Suspension system | Hip belt should carry 70–80% of load weight | Anatomic hip belt with aluminium or carbon stays |
Altitude sickness guide for Cusco and Machu Picchu
How to acclimatise, what medication to carry, and what to do if symptoms appear on the trail — essential reading before any Andes expedition.
The Best Expedition Backpacks 50–65L: Multi-Day Andes Treks
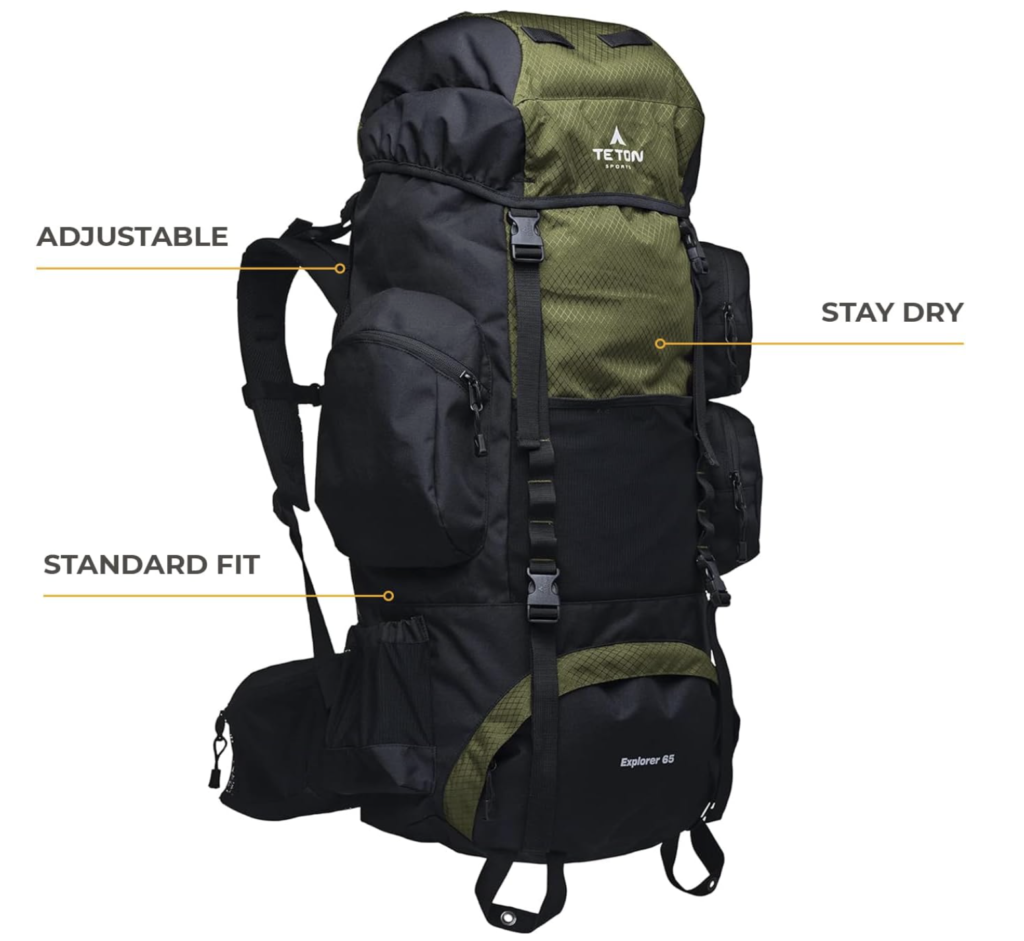
The 50–65L range is the sweet spot for multi-day Andes trekking. Large enough to carry a 4-season sleeping bag, a down jacket, a full change of clothes, 3 days of food, water, a first aid kit, and your camera kit — without being so large that porters are required for a fit person to manage it. All picks below have been selected for specific Andean suitability, not just general trekking performance.
Best Expedition Backpacks for Photographers: Camera Access Plus Trekking Capacity
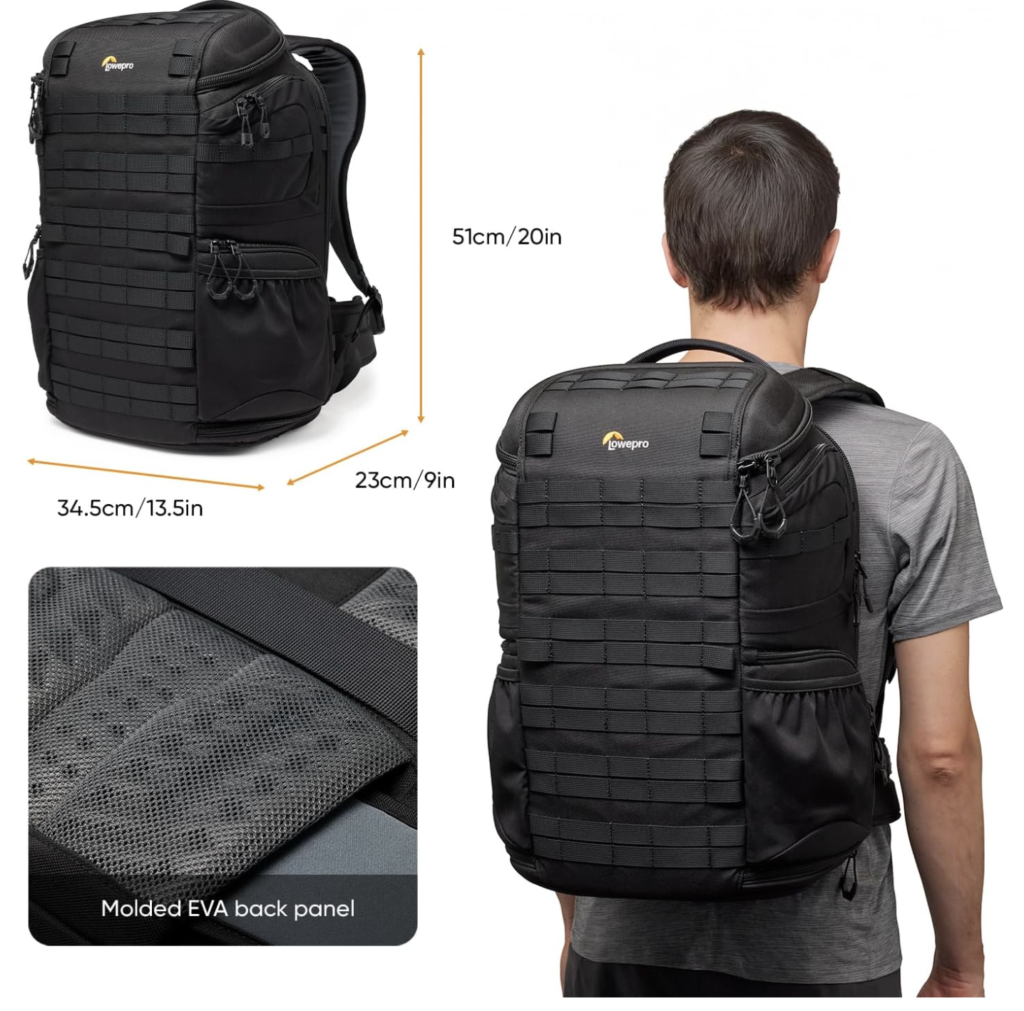
Standard trekking packs do not protect cameras well. Camera bodies and lenses stored loose in the main compartment get covered in dust from dry-season trails, soaked in condensation from rainforest approaches, and damaged by the vibration of jeep tracks on the Bolivian altiplano. A dedicated photography expedition pack solves this by integrating a padded camera compartment — either as a removable insert, a separate lower section, or a quick-access panel — with the full load-carrying capacity of an expedition pack.
How to photograph the Salar de Uyuni mirror effect
Camera settings, composition techniques, and timing for the most iconic photography location in the Andes — and what gear to carry to get there.
Essential Accessories: What to Add to Your Expedition Pack
The pack is the foundation. These accessories make it perform at the level that Andean conditions demand. Each link goes directly to Amazon using the affiliate tag — same price for you, small commission for this site that helps keep the guides free.
How to Pack Your Expedition Backpack for the Andes
How you pack the bag matters almost as much as which bag you choose. An incorrectly packed 65L pack in poor balance will wear you out in 3 hours. The same pack correctly loaded will feel manageable after 8 hours on the trail. The principles below are specific to Andean conditions — altitude, temperature swings, and photography gear — rather than generic packing advice.
The three zones of an expedition pack
Bottom zone: sleeping bag, sleeping bag liner, and camp shoes. These are the heaviest single item (sleeping bag) and the items you need last in camp — they stay at the bottom. In wet weather, keep the sleeping bag inside its dry bag regardless of whether it is already in a compression sack.
Middle zone (the power zone): the heaviest items go here, as close to your back as possible and as high as possible within the main compartment. In the Andes, this means: tent or bivy, food, water filter, cooking system. Camera bodies and lenses, if not in a dedicated camera pack, go in the middle zone in a padded insert — never in the top or side pockets where impact protection is minimal.
Top zone and lid pocket: everything you need on the trail without stopping to open the main compartment. Rain jacket, snacks, sunscreen, sunglasses, headlamp, first aid, phone, and altitude medication. The lid pocket should be treated as your all-day carry — everything in it should be accessible in 10 seconds or less.
The table
| Pack Zone | What Goes Here | Why |
|---|---|---|
| Bottom (lowest) | Sleeping bag (in dry bag), sleeping bag liner, camp shoes | Heaviest volume item; not needed until camp; insulates from bottom |
| Middle-back | Tent/bivy, food, water, cooking system | Heaviest items closest to spine = best balance and load transfer |
| Middle-front | Clothing layers, down jacket (in dry bag) | Lightweight filler; buffers camera gear from tent poles |
| Camera zone | Camera body + lenses in padded insert or LowePro cube | Protected from clothing movement and pack compression |
| Top of main | Rain jacket, emergency layer, extra food | Accessible without major unpacking; changes throughout the day |
| Lid pocket | Snacks, sunscreen, headlamp, phone, altitude meds, cash | On-trail access — open 20+ times per day |
| Hip belt pockets | Camera battery, energy bar, lip balm, AirPods | Hand-accessible while walking — never stop for these items |
| Side pockets | Water bottles (×2), trekking pole when stowed | One-handed access; bottles must be reachable without removing pack |
La Paz Bolivia — complete travel guide
La Paz is the gateway to the Bolivian altiplano and the starting point for most Bolivia trekking expeditions. Altitude acclimatisation, accommodation, and logistics.
Fitting Your Expedition Pack Correctly: The Step Most People Skip
A pack that is the wrong size for your torso will cause pain on day one and injury by day three, regardless of how expensive or well-engineered it is. Most trekking shops outside major cities will not fit a pack for you — and most people buying online skip this step entirely. Here is how to do it yourself before you leave home.
Measure your torso length, not your height. Stand upright and find the bony prominence at the base of your neck (C7 vertebra) — the bump you feel when you tilt your head forward. Measure the straight-line distance from C7 to the top of your hip bones (iliac crest). This measurement — typically 40–52 cm in adults — determines your pack size, not your height.
Set the hip belt first. When wearing the pack loaded, the hip belt should sit centred on your iliac crest — the top of the hip bone, not your waist. Buckle and tighten the hip belt so that 70–80% of the load weight sits on your hips, not your shoulders. If the belt rides above or below the hip bone, the torso length is wrong.
more …
Check shoulder straps. The shoulder straps should follow the contour of your shoulders and make contact from the shoulder blade to approximately 5 cm below the collar bone. If there is a gap at the top or if the straps dig into your neck, readjust the torso length setting (most packs have this adjustment) or try a different size.
Test with a full load at home. Fill the pack to your expected expedition weight and walk around for 30 minutes before your trip. Any discomfort — hot spots, pressure points, hip belt sliding — is fixable at home but very difficult to address on the Inca Trail on day two.
Milky Way photography at Salar de Uyuni — complete guide
Astrophotography settings, moon phase planning, and the dry crust reflection technique. What gear to carry and how to protect it in extreme cold.
Protecting Your Pack in Andean Conditions: Salt, UV, and Altitude Cold
The Andes are hard on equipment in ways that most gear reviews do not test for. Standard expedition packs are tested in temperate mountain conditions — not at the UV intensity of 4,000+ metres, not in the salt spray environment of the Salar de Uyuni, and not at the sustained -20°C night temperatures of a Bolivian altiplano winter. Here is what to know.
UV degradation
Ultraviolet radiation at 4,000 metres is approximately 40% more intense than at sea level. Nylon and polyester fabrics lose tensile strength and DWR (Durable Water Repellent) coating effectiveness significantly faster at altitude. For packs used on multi-week Andean expeditions over multiple years, this means: store your pack out of direct sunlight whenever possible, re-apply DWR treatment (Nikwax TX.Direct spray works on pack fabric) after every major trip, and replace the pack before the material shows visible breakdown rather than after.
Salt flat conditions (Uyuni and Atacama)
If your expedition includes the Salar de Uyuni — particularly the wet season, when you are walking through brine water — salt crystals will penetrate every zipper and buckle. After any Uyuni visit, shake out the pack completely, wipe down all metal hardware with a damp cloth, and allow the pack to dry fully in a warm indoor space before storage. Salt-seized zippers are the number one post-Uyuni pack failure.
Cold weather storage and use
At -15°C to -20°C (typical July nights on the Bolivian altiplano), plastic buckles and hip belt padding become brittle. Do not force cold plastic buckles — warm them in your hands for 30 seconds before clicking. Foam padding in hip belts loses its compressive memory at extreme cold — the pack may feel less supportive in the first hour of a cold morning until the foam warms up. Carbon and aluminium frame stays are unaffected by cold.
Full Comparison: Which Pack Is Right for Your Andes Expedition?
| Pack | Capacity | Weight | Best For | Camera Friendly | Price Range |
|---|---|---|---|---|---|
| Osprey Atmos AG 65 | 65L | 2.27 kg | General trekking — Inca Trail, Salkantay, Patagonia | Moderate (insert needed) | $$$ (mid-high) |
| Gregory Baltoro 65 | 65L | 2.49 kg | Heavy loads — full camera kit + expedition gear | Good (U-zip panel) | $$$$ (premium) |
| Deuter Aircontact Lite 65+10 | 65+10L | 1.98 kg | Budget expedition — best value in category | Moderate (insert needed) | $$ (mid) |
| Lowepro ProTrekker BP 450 AW II | ~45L | 2.35 kg | Photography-first expeditions — camera is the priority | Excellent (built-in) | $$$ (mid-high) |
| Osprey Farpoint Trek 55 | 55L (40+15) | 2.1 kg | Multi-modal travel + trekking — city to trail | Moderate | $$$ (mid-high) |
The simplest decision tree: if your priority is photography, choose the Lowepro ProTrekker. If you are carrying a heavy load (full gear + camera system, 15+ kg), choose the Gregory Baltoro. and If you want the best all-round performance for a standard expedition, choose the Osprey Atmos AG 65. If budget matters, the Deuter Aircontact Lite delivers 90% of the performance at 70% of the cost.
Conclusion: The Pack Is the Foundation of the Expedition
Every piece of advice in this guide, every photograph in the Bolivia photography series, every route description in the trek guides — it all starts with showing up at the trailhead with a pack that fits, carries well, and protects what is inside it. A great pack does not make a great expedition, but a bad pack can end one.
The five packs in this guide represent the genuine best options available in 2026 for Andean conditions. None of them will let you down on the Inca Trail, the Salkantay, the Bolivian altiplano crossing, or the Torres del Paine W Circuit. The differences between them are real — the Atmos AG ventilates better, the Baltoro carries heavier loads more comfortably, the Lowepro ProTrekker serves photographers specifically — but any of them is a significant upgrade over an under-engineered travel bag pressed into expedition service.
Check this post …
Laguna Colorada flamingo photography — Bolivia
How to photograph the red lake and James’s flamingo colony in Eduardo Avaroa National Reserve — and what to carry when your pack needs to survive the altiplano crossing.
Choose the one that matches your primary expedition type, buy it with enough time to fit and test it before departure, and pack it correctly. Everything else in your Andes adventure is more variable than your backpack — the weather, the altitude acclimatisation, the tour logistics, the photography conditions. The pack is the one thing fully within your control. Make a good decision here and it will serve you across multiple seasons and multiple Andean destinations.
All the other guides you need for planning your Andes expedition are linked throughout this article — altitude sickness, photography at Uyuni, La Paz logistics, Laguna Colorada flamingos, Patagonia photography. Explore the full Bolivia & Salt Flats Photography series and the destination travel guides in the navigation above. See you on the trail.